2023 eBaseball Characters
From MLB Power Pros Wiki
(→Catchers: was missing Kaname Minazuki) |
m (Bolded Shirase's name) |
||
| Line 249: | Line 249: | ||
| '''D'''aisuke '''Bonda''' [[Image:pfp_Bonda.jpg]] || <span style="color:red">SP</span>/<span style="color:pink">MR</span>/<span style="color:pink">CP</span> || [[Image:R_Handed.png]] || [[Image:R_Handed.png]] || Player Set 2 || 265 || 0 || 142 km/h || [[Image:Rank_C.png]] 60 || [[Image:Rank_C.png]] 65 || Lv. 2 Slider, Lv. 2 Forkball, Lv. 2 Hard Sinker || Recovery C, <span style="color:blue">Trusty</span> || [[Image:TRJ2.png]] || [[Image:Rank_D.png]] 58 || [[Image:Rank_D.png]] 55 || [[Image:Rank_B.png]] 75 || [[Image:Rank_D.png]] 59 || [[Image:Rank_F.png]] 30 || [[Image:Rank_G.png]] 10 || <span style="color:blue">Clutch B, Squibber</span> | | '''D'''aisuke '''Bonda''' [[Image:pfp_Bonda.jpg]] || <span style="color:red">SP</span>/<span style="color:pink">MR</span>/<span style="color:pink">CP</span> || [[Image:R_Handed.png]] || [[Image:R_Handed.png]] || Player Set 2 || 265 || 0 || 142 km/h || [[Image:Rank_C.png]] 60 || [[Image:Rank_C.png]] 65 || Lv. 2 Slider, Lv. 2 Forkball, Lv. 2 Hard Sinker || Recovery C, <span style="color:blue">Trusty</span> || [[Image:TRJ2.png]] || [[Image:Rank_D.png]] 58 || [[Image:Rank_D.png]] 55 || [[Image:Rank_B.png]] 75 || [[Image:Rank_D.png]] 59 || [[Image:Rank_F.png]] 30 || [[Image:Rank_G.png]] 10 || <span style="color:blue">Clutch B, Squibber</span> | ||
|- | |- | ||
| - | | Fukiko Shirase [[Image:pfp_Shirase.jpg]] || <span style="color:red">SP</span>/<span style="color:pink">MR</span>/<span style="color:pink">CP</span> || [[Image:R_Handed.png]] || [[Image:Rank_S.png|20px]] || Player Set 5 || 293 || 0 || 130 km/h || [[Image:Rank_C.png]] 60 || [[Image:Rank_A.png]] 80 || Eephus, Lv. 2 Palmball, Lv. 2 Sweeping Curve, Lv. 1 Circle Change || <span style="color:blue">Heater A, Trusty, Reflexes, Gripper, Toolkit</span>, <span style="color:green">Pace</span> || [[Image:TRJ4.png]] || [[Image:Rank_D.png]] 50 || [[Image:Rank_D.png]] 50 || [[Image:Rank_C.png]] 60 || [[Image:Rank_E.png]] 45 || [[Image:Rank_C.png]] 65 || [[Image:Rank_D.png]] 50 || <span style="color:blue">Clutch B, Clutch</span>, <span style="color:green">Good Eye, Slugger</span> | + | | Fukiko '''Shirase''' [[Image:pfp_Shirase.jpg]] || <span style="color:red">SP</span>/<span style="color:pink">MR</span>/<span style="color:pink">CP</span> || [[Image:R_Handed.png]] || [[Image:Rank_S.png|20px]] || Player Set 5 || 293 || 0 || 130 km/h || [[Image:Rank_C.png]] 60 || [[Image:Rank_A.png]] 80 || Eephus, Lv. 2 Palmball, Lv. 2 Sweeping Curve, Lv. 1 Circle Change || <span style="color:blue">Heater A, Trusty, Reflexes, Gripper, Toolkit</span>, <span style="color:green">Pace</span> || [[Image:TRJ4.png]] || [[Image:Rank_D.png]] 50 || [[Image:Rank_D.png]] 50 || [[Image:Rank_C.png]] 60 || [[Image:Rank_E.png]] 45 || [[Image:Rank_C.png]] 65 || [[Image:Rank_D.png]] 50 || <span style="color:blue">Clutch B, Clutch</span>, <span style="color:green">Good Eye, Slugger</span> |
|- | |- | ||
|} | |} | ||
Revision as of 04:00, 25 April 2023
There are hundreds of characters available to use on your team in the 2023 eBASEBALL Power Pros game. Some may be unlocked via playing the online tournaments, while others are part of the Player Sets you can choose from at the start of the game. Details on how to acquire these players are listed here as well.
Ability names are taken after the names used in the English "translation" of the game for convenience. This list may or may not be updated with the fan-translated names of the abilities at a later date.
NOTES ON PLAYER SETS: The game references players that can be unlocked as part of the base sets and by using Championship Points (CP). Here are the definitions of the base sets:
- Player Set 1: Players available in the game at its February 8, 2023 launch
- Player Set 2: Players available after the first mass character addition on March 1, 2023
- Player Set 3: Players available after the second mass character addition on March 19, 2023
- Player Set 4: Players available after the third mass character addition on April 9, 2023
- Player Set 5: Players available after the fourth mass character addition on April 23, 2023
Contents[hide] |
Pitchers
Name  | Aptitude  | Throws  | Bats  | Acquisition Req.  | Star Point  | Point Cost  | Top Speed  | Control  | Stamina  | Breaking Balls  | Special Abilities (Pitching)  | Trajectory  | Contact  | Power  | Run Speed  | Arm Strength  | Fielding  | Error Resistance  | Special Abilities (Hitting)  | Player Notes
 |
|---|---|---|---|---|---|---|---|---|---|---|---|---|---|---|---|---|---|---|---|---|
Mamoru Ikari  | SP | | | Player Set 1 | 466 | 6 | 149 km/h | | | Lv. 4 Slider, Lv. 4 Curveball, Lv. 4 Forkball, SP Fastball 1 | W/RISP B, Handler, Recovery C, Chill, Power P, Star | | | | | | | | Slugger, Slugger | |
Yasushi Abata (Younger)  | SP/MR/CP | | | Player Set 1 | 318 | 2 | 145 km/h | | | Lv. 2 Shuuto, Lv. 5 SP Forkball 1 | Recovery B, Breaking Ball P | | | | | | | | ||
Aoi Hayakawa  | MR/CP | | | Player Set 1 | 217 | 0 | 135 km/h | | | Lv. 3 Curveball, Lv. 4 SP Sinker 1 | Toolkit, Hot Head, Recovery C, Breaking Ball P | | | | | | | | ||
Yujiro Shindoh  | SP | | | Player Set 1 | 453 | 5 | 151 km/h | | | 2SFB, Lv. 5 Slider, Lv. 3 CB, Lv. 2 Forkball | Star | | | | | | | | ||
Mizuki Tachibana  | MR/CP | | | Player Set 1 | 330 | 3 | 138 km/h | | | Lv. 1 Slider, Lv. 5 SP Sinker 2, Lv. 3 Screwball | Poise F, Recovery C, Crossfire, Downplay, Moody, Breaking Ball P, Pace | | | | | | | | ||
Haruto Aoba  | SP | | | Player Set 1 | 336 | 6 | 147 km/h | | | Lv. 6 SP Slider 1, Lv. 2 Knuckle Curve | W/RISP B, Recovery C, Cutter, Ironball, Dr. K, Battler, Vs. Slugger, Breaking Ball P | | | | | | | | ||
Ken Yamaguchi  | SP | | | Player Set 1 | 336 | 4 | 147 km/h | | | Lv. 2 Curveball, Lv. 7 Forkball | W/RISP B, Recovery C, Lucky, Breaking Ball P | | | | | | | | ||
Nanseki Suzaku  | SP/OF | | | Player Set 1 | 431 | 3 | 157 km/h | | | Lv. 3 Shuuto, Lv. 2 Screwball | Heater B, Recovery C, Cutter | | | | | | | | Throwing B, Laser | |
Munemitsu Matsukura  | SP | | | Player Set 1 | 305 | 0 | 145 km/h | | | Lv. 4 Curveball, Lv. 3 Forkball | Recovery C, Vs. Slugger, Hot Head | | | | | | | | ||
Rei Hisakata  | SP | | | Player Set 1 | 378 | 1 | 150 km/h | | | Lv. 4 Hard Slider, Lv. 2 Splitter | Recovery C | | | | | | | | ||
Kenichi Shiroyama  | MR/CP | | | Player Set 2 | 310 | 6 | 155 km/h | | | Lv. 4 Vertical Slider, Lv. 1 Curveball, SP Fastball 2 | Heater B, Recovery C, Ironball, Guts, Toolkit, Hot Head | | | | | | | | ||
Otome 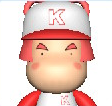 | SP | | | Player Set 2 | 401 | 2 | 155 km/h | | | Lv. 2 Slider, Lv. 2 Shuuto, Lv. 2 Forkball | w/RISP, Recovery C, Momentum, Lucky | | | | | | | | ||
Alvin Lockhart 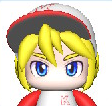 | SP | | | Player Set 2 | 332 | 2 | 148 km/h | | | Lv. 2 Cutter, Lv. 1 Slurve, Lv. 3 SP Forkball 2 | Heater B, Recovery C, Vs. Slugger, Downplay | | | | | | | | ||
Daisuke Suzumoto  | SP | | | Player Set 1 | 535 | 7 | 149 km/h | | | Lv. 3 Slider, Lv. 3 Shuuto, Lv. 4 Knuckleball | vs. LHB A, Poise B, Heater B, Agile B, Recovery C, Pickoff, Handler, Reflexes, Gripper, Low Ball, Chill, Star, Power P, Pace | | | | | | | | ||
Taro Tanakayama  | SP/SS | | | Player Set 2 | 437 | 1 | 142 km/h | | | Lv. 5 Forkball | Recovery C | | | | | | | | Bunt, Glover, Slap Hitter, Aggressive FLD | |
Mitsuhiko Kagurazaka  | SP | | | Player Set 3 | 487 | 6 | 153 km/h | | | Lv. 7 Curveball, Lv. 3 Slider, Lv. 3 Shuuto, Lv. 3 Screwball | Poise B, Recovery C | | | | | | | | ||
Hiromi Tachikawa  | SP/3B | | | Player Set 1 | 427 | 3 | 141 km/h | | | Lv. 3 Hard Shuuto, Lv. 3 Screwball, Lv. 3 Curveball | w/RISP B, Poise B, Heater A, Recovery C, Ironball, Momentum, Vs. Slugger | | | | | | | | Bunt Ace, Rally, Aggressive FLD | |
Ryu Kamitaka  | SP | | | Player Set 1 | 388 | 4 | 150 km/h | | | Lv. 6 Slider, Lv. 5 Curveball | Recovery C, Dr. K, Low Ball, Downplay, Choker | | | | | | | | ||
Hikaru Kuon  | SP | | | Player Set 1 | 290 | 0 | 148 km/h | | | Lv. 5 Slider, Lv. 1 Hard Shuuto, Lv. 1 Curveball | W/RISP F, Poise F, Recovery C, Airball, Breaking Ball P | | | | | | | | ||
Daigogetsu  | SP | | | 2000 CP | 524 | 11 | 170 km/h | | | 2SFB, Lv. 3 Hard Shuuto, Lv. 3 Splitter | Ironball, Tyrant, Bluffer, Meatball | | | | | | | | Slugger | |
Tsutomu Tatenishi  | SP/MR | | | Player Set 1 | 312 | 0 | 138 km/h | | | Lv. 2 Slider, Lv. 2 Shuuto, Lv. 1 Curveball, Lv. 1 Sinker | W/RISP B, Recovery C, Handler, Reflexes, Breaking Ball P | | | | | | | | ||
Papillon  | CP/2B/SS | | | Player Set 4 | 683 | 6 | 150 km/h | | | Lv. 3 Slider, Lv. 5 12-6 Curveball, Lv. 2 Forkball | Heater B, Recovery C, Tyrant, Aggressive Fielding | | | | | | | | Clinical, Slugger | |
Hope Suzukaze  | SP | | | Player Set 1 | 334 | 4 | 143 km/h | | | 2SFB, Lv. 3 Knuckle Curve, Lv. 5 SP Forkball 3 | W/RISP B, Recovery C, Gripper, Star | | | | | | | | Push Hit | Was banned from use in online tournaments prior to first Olympic Global Qualifier |
Mataro Mizuno 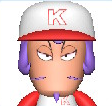 | MR/CP | | | Player Set 1 | 350 | 1 | 144 km/h | | | Moving Fastball, Lv. 4 Curveball, Lv. 4 Screwball, Lv.4 Knuckleball | Cutter, Dr. K, Downplay, Airball, Choker, Recovery C, Breaking Ball P | | | | | | | | ||
Tsuyoshi Hagane  | SP/MR | | | Player Set 1 | 414 | 3 | 146 km/h | | | Lv. 4 Hard Sinker, Lv. 5 Curveball | w/RISP B, Heater B, Recovery C, Vs. Runner | | | | | | | | ||
Arashi Kiba  | SP | | | Player Set 1 | 385 | 9 | 152 km/h | | | Lv. 3 Hard Slider, Lv. 3 Curveball, Lv. 3 Forkball, SP Fastball 3 | Heater A, Recovery C, Gyroball, Ironball, Crossfire, Power P | | | | | | | | Clutch A, Throwing C, Slugger, Good Eye, Slugger | |
Juzo Saigoh  | CP | | | Player Set 3 | 383 | 2 | 154 km/h | | | Lv. 2 Hard Slider, Lv. 2 Forkball, Eephus | Agile A, Recovery C, Bluffer, Vs. Runner, Chill, Power P | | | | | | | | Throwing A | |
Graviton Arai  | SP | | | Player Set 5 | 470 | 8 | 155 km/h | | | Lv. 5 Hard Slider, Lv. 5 Changeup | Heater A, Recovery C, Gyroball, Tyrant, Power Pitcher | | | | | | | | Throwing C, Slugger, Slugger, Aggressive Hitter | |
Eiji Kureba  | SP/MR/CP | | | Player Set 1 | 423 | 7 | 149 km/h | | | Lv. 5 Forkball, Lv. 7 Slow Curve | w/RISP A, Recovery C, Dr. K, Crossfire, Low Ball | | | | | | | | Stealing A, Throwing A, Aggressive FLD, Selfless | |
Kazune Inukawa  | SP | | | Player Set 2 | 316 | 0 | 136 km/h | | | Lv. 2 Hard Shuuto, Lv. 4 Sinker, Lv. 2 Forkball | Poise F, Recovery C, Bluffer, Downplay, Pace | | | | | | | | ||
Itsutaro Shirana 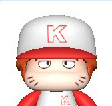 | SP | | | Player Set 2 | 357 | 3 | 142 km/h | | | Lv. 3 Shuuto, Lv. 4 Slider, Lv. 3 Forkball | Recovery C, Momentum, Dr. K, Handler, Pace | | | | | | | | ||
Ayumi Sana  | SP/MR | | | Player Set 1 | 278 | 0 | 134 km/h | | | Lv. 2 Slider, Lv. 1 Screwball, Lv. 5 Curveball | Poise B, Recovery C, Low Ball | | | | | | | | ||
Taro Junketsu  | MR/3B/OF | | | 350 CP | 451 | 6 | 151 km/h | | | 2SFB, Lv. 2 Vertical Slider, Lv. 7 Slow Curve | Heater A, Agile F, Recovery C, Ironball, Guts | | | | | | | | Pull Hit, Trucker | |
Kazuya Unkai  | SP | | | 2300 CP | 427 | 9 | 155 km/h | | | SP Fastball 5, Lv. 3 Shuuto, Lv. 4 Splitter, Lv. 3 Slider | Cutter, Ironball, Battler, Vs. Slugger | | | | | | | | Clinical, Sprayer, Push Hit | |
Tamura  | SP | | | Player Set 2 | 317 | 0 | 149 km/h | | | Lv. 2 Sinker, Lv. 2 Curveball | Recovery C, Ironball, Trusty, Momentum, Slugger, Power P | | | | | | | | Trucker | |
Tomio Matsuzaki 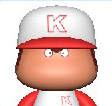 | SP | | | Player Set 3 | 284 | 3 | 153 km/h | | | Lv. 5 Curveball | Heater B, Recovery C, Ironball, Trusty, Power Pitcher | | | | | | | | Throwing F | |
Go  | SP/3B | | | 3700 CP | 535 | 5 | 155 km/h | | | Lv. 2 Shuuto, Lv. 2 Sinker, Lv. 3 Hard Slider | Dr. K, Downplay | | | | | | | | ||
Muneatsu Atsumori (Possessed)  | SP/OF | | | 5000 CP | 485 | 6 | 155 km/h | | | Lv. 3 CB, Lv. 6 SP Ball | Battler, Hot Head | | | | | | | | Slugger, Rally | |
Yuki Takano  | SP | | | Player Set 1 | 365 | 0 | 138 km/h | | | Lv. 2 Shuuto, Lv. 2 Cutter, Lv. 3 Circle Change | W/RISP F, Recovery C, Vs. Runner | | | | | | | | ||
Harrison Onishi (With Goggles) 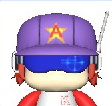 | SP/MR/CP | | | Player Set 2 | 447 | 8 | 151 km/h | | | Lv. 4 Slider, Lv. 4 Curveball, Lv. 4 Forkball, Lv. 4 Screwball | Bullett, Recovery C, Bluffer, Chill, Power Pitcher | | | | | | | | Throwing C | |
Muneatsu Atsumori (Base)  | SP/OF | | | Player Set 1 | 374 | 0 | 145 km/h | | | Lv. 4 Hard Shuuto, Lv. 3 Curveball | Poise A, Recovery C | | | | | | | | Slugger, Rally | |
Yuta Tarumoto  | SP | | | Player Set 3 | 314 | 4 | 153 km/h | | | Lv. 2 Hard Slider, Lv. 4 Vertical Slider, 2-Seam Fastball | Heater B, Recovery C, Ironball, Moody, Power Pitcher | | | | | | | | ||
Subaru Hoshii  | SP | | | Player Set 1 | 329 | 2 | 144 km/h | | | Lv. 3 Slider, Lv. 3 Sinker, Lv. 4 SP Forkball 4 | W/RISP F, Recovery C, Trusty, Momentum | | | | | | | | Throwing C, Sprayer, High Hit | |
Ranzo Zenigata  | SP | | | Player Set 3 | 367 | 1 | 142 km/h | | | Lv. 3 Slider, Lv. 3 Forkball, Lv. 3 Sinker | W/RISP B, Vs. LHB B, Poise B, Recovery C, Downplay, Choker, Hot Head, Power Pitcher | | | | | | | | Aggressive Fielding | |
Shoji Hamasaki  | SP/MR/CP | | | Player Set 3 | 270 | 0 | 143 km/h | | | Lv. 2 Slider, Lv. 2 Forkball, Lv. 2 Shuuto | Recovery C, Momentum, Battler, Unlucky, Hot Head | | | | | | | | ||
Shiro Arashimaru (No Goggles)  | SP/MR/CP | | | Player Set 1 | 242 | 0 | 142 km/h | | | Lv. 2 Slider, Lv. 2 Curveball, Lv. 2 Forkball, Lv. 2 Sinker | Recovery C, Vs. Slugger | | | | | | | | ||
Takemitsu Karasuma  | SP | | | Player Set 5 | 418 | 6 | 149 km/h | | | Lv. 5 Hard Slider, Lv. 5 Vertical Slider, Lv. 1 Shuuto | Poise A, Heater B, Recovery C, Reflexes, Downplay, Hot Head | | | | | | | | Throwing C | |
Anne Aznable (US Minor Leaguer)  | MR | | | Player Set 4 | 279 | 0 | 143 km/h | | | Lv. 2 Slider, Lv. 3 Curveball, Lv. 3 Forkball, Lv. 1 Shuuto | W/RISP B, Recovery C, Reflexes | | | | | | | | ||
Masaru Tsuruya  | SP/MR | | | Player Set 1 | 291 | 1 | 144 km/h | | | Lv. 3 Slider, Lv. 3 Splitter | Vs. LHB A, Heater A, Recovery C, Downplay, Walk, Hot Head | | | | | | | | Runner B, Squibber | |
Yamato Inuki  | SP/MR/CP | | | Player Set 4 | 470 | 3 | 148 km/h | | | Lv. 3 Slider, Lv. 4 Changeup, Lv. 3 Sinker | w/RISP A, Poise B, Recovery C, Low Ball, Bluffer, Chill | | | | | | | | ||
Touya Ichinose  | SP | | | Player Set 1 | 418 | 3 | 142 km/h | | | Lv. 2 Shuuto, Lv. 4 Screwball, Lv. 3 Curveball, Lv. 3 Slider | Recovery C, Tyrant, Chill, Breaking Ball P | | | | | | | | ||
Hanshiro Chouno 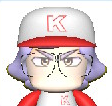 | SP/MR/CP | | | Player Set 3 | 296 | 0 | 135 km/h | | | Lv. 3 Slider, Lv. 3 Knuckle Curve, Lv. 3 Circle Change, Lv. 3 Shuuto | Handler, Airball, Unlucky, Breaking Ball Pitcher, Pace | | | | | | | | ||
Yakumo Hokuto  | SP/MR/CP | | | Player Set 2 | 401 | 4 | 149 km/h | | | 2-Seam Fastball, Lv. 4 Cutter, Lv. 4 Forkball | Heater B, Recovery C, Pace | | | | | | | | Throwing C | |
Kouichi Kino  | SP/MR/CP | | | Player Set 3 | 372 | 1 | 142 km/h | | | Lv. 2 Slider, Lv. 3 Curveball, Lv. 2 Forkball, Lv. 3 Sinker, Moving Fastball | Recovery C, Cutter, Handler, Downplay, Breaking Ball Pitcher, Pace | | | | | | | | Aggressive Fielding | |
Tomoaki Mitamura  | SP/MR/CP | | | Player Set 5 | 263 | 0 | 131 km/h | | | Lv. 3 Sweeping Curve, Lv. 4 Palmball, Lv. 4 Sinker | Agile B, Recovery C, Trusty, Guts, Low Ball, Breaking Ball Pitcher, Pace | | | | | | | | Victor, Clutch | |
Asune Hakata  | SP/MR/CP | | | Player Set 3 | 263 | 0 | 134 km/h | | | Lv. 4 Cutter, Lv. 3 Slow Curve, Eephus | W/RISP B, Recovery C, Cutter, Toolkit | | | | | | | | Survivor, Squibber | |
Makoto Nijitani  | SP/MR/CP | | | Player Set 4 | 517 | 6 | 148 km/h | | | Lv. 3 Slider, Lv. 3 Shuuto, Lv. 3 Curveball, Lv. 5 Forkball | Recovery C, Cutter, Dr. K, Breaking Ball Pitcher | | | | | | | | ||
Eight One  | SP/MR/CP | | | Player Set 2 | 353 | 5 | 149 km/h | | | Lv. 5 Curveball, Lv. 3 Screwball | Heater A, Agile B, Recovery C, Ironball, Battler, Toolkit, Chill, Power P | | | | | | | | Throwing C, Slugger, Slugger | |
Reito Sudo  | SP/MR/CP | | | Player Set 3 | 350 | 4 | 160 km/h | | | Lv. 2 Cutter, Lv. 2 Splitter | Poise B, Heater B, Recovery C, Gyroball, Trusty, Power Pitcher, Pace | | | | | | | | ||
Itsuki Sakurazawa  | SP | | | Player Set 4 | 365 | 2 | 147 km/h | | | SP Fastball 2, Lv. 4 Slider, Lv. 3 Changeup | Cutter, Toolkit, Breaking Ball Pitcher | | | | | | | | ||
Luna Izayoi  | SP/MR/CP/OF | | | Player Set 1 | 373 | 0 | 140 km/h | | | Lv. 3 Shuuto, Lv. 3 12-6 Curveball | Recovery C, Gyroball, Reflexes, Guts, Pace | | | | | | | | Morale | |
Takafumi Kurama  | SP/MR/CP/OF | | | Player Set 2 | 453 | 6 | 149 km/h | | | Lv. 5 SP Slider 2, Lv. 3 Knuckleball | Heater A, Recovery C, Battler, Guts, Power P | | | | | | | | Good Eye, Patient Hitter, Aggressive Stealing, Aggressive Fielding | |
Takeaki Fukumizu  | SP/MR/CP/OF | | | Player Set 1 | 466 | 4 | 145 km/h | | | Lv. 2 Curveball, Lv. 2 Forkball, Lv. 4 SP Shootball 2 | Recovery C, Cutter, Ironball, Reflexes, Tyrant, Power P | | | | | | | | Good Eye, Patient Hitter | |
Shiro Arashimaru (Goggles)  | SP/MR/CP | | | Player Set 1 | 363 | 3 | 147 km/h | | | Lv. 3 Slider, Lv. 3 Curveball, Lv. 3 Forkball, Lv. 3 Sinker | Heater B, Recovery C, Vs. Slugger | | | | | | | | Clinical, Good Eye | |
Bucho  | SP/MR/CP | | | Player Set 5 | 361 | 6 | 152 km/h | | | Lv. 7 Forkball, Lv. 3 Curveball, Lv. 3 Slider | Recovery C | | | | | | | | ||
DJB-78  | SP | | | Player Set 5 | 367 | 0 | 147 km/h | | | Lv. 3 Forkball | Recovery C, Timer, Bluffer, Pace | | | | | | | | Throwing C | |
Terry Mileman  | SP/MR/CP | | | Player Set 4 | 433 | 11 | 160 km/h | | | SP Fastball 6, Lv. 2 Hard Slider, Lv. 4 Splitter | W/RISP B, Heater B, Recovery C, Cutter, Ironball, Tyrant, Power Pitcher | | | | | | | | ||
Gosuke Rakugaki 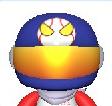 | SP/MR/CP | | | Player Set 2 | 307 | 0 | 145 km/h | | | Lv. 2 Slider, Lv. 2 Slow Curve, Lv. 2 Splitter, Lv. 2 Shuuto | Recovery C, Cutter, Trusty, Hot Head | | | | | | | | ||
Kaede Yukino  | SP/MR | | | Player Set 5 | 295 | 0 | 135 km/h | | | Lv. 3 Forkball, Lv. 2 Screwball, Lv. 2 Curveball, Lv. 1 Shuuto | Trusty, Reflexes, Toolkit, Bluffer | | | | | | | | Throwing C | |
Queen Cocoro  | SP/OF | | | Player Set 5 | 483 | 4 | 150 km/h | | | SP Fastball 8, Lv. 6 Hard Sinker | Poise A, Recovery C, Lucky, Toolkit, Hot Head | | | | | | | | Throwing B, Clinical, Rally, Morale, Slap Hitter, Patient Hitter | |
Yuuto Narumi  | SP | | | Player Set 2 | 364 | 1 | 145 km/h | | | Lv. 2 Cutter, Lv. 3 Curveball, Lv. 3 SP Forkball 7 | Cutter, Pickoff, Lucky, Pace | | | | | | | | ||
Yakyuman1Gou  | SP/MR/CP | | | Player Set 3 | 292 | 4 | 138 km/h | | | Lv. 6 SP Sinker 1, Lv. 4 Curveball | Recovery C, Battler, Toolkit, Hot Head, Breaking Ball Pitcher | | | | | | | | ||
Yakyuman2Gou  | SP/MR/CP | | | Player Set 3 | 346 | 4 | 143 km/h | | | Lv. 5 SP Sinker 2, Lv. 3 Slider | Poise F, Recovery C, Crossfire, Vs. Slugger, Bluffer, Downplay, Moody, Breaking Ball Pitcher, Pace | | | | | | | | ||
Harrison Onishi (No Goggles)  | SP/MR/CP | | | Player Set 1 | 432 | 5 | 151 km/h | | | Lv. 4 Slider, Lv. 4 Curveball, Lv. 4 Forkball, Lv. 4 Screwball | Recovery C, Bluffer, Chill, Power P | | | | | | | | ||
Teru Ereki  | SP/MR/CP | | | Player Set 1 | 349 | 2 | 144 km/h | | | Lv. 3 Slider, Lv. 4 Curveball, Lv. 4 SP Shootball 3 | Cutter, Insider | | | | | | | | Clinical, Squibber, Clutch | |
Reiji Ino  | SP/MR/CP | | | Player Set 4 | 359 | 2 | 138 km/h | | | Lv. 4 Circle Change, Lv. 3 Splitter, Lv. 4 Sweeping Curveball | Recovery C, Cutter, Gripper, Toolkit, Breaking Ball Pitcher | | | | | | | | Clinical, Good Eye | |
Shunji Daito  | SP | | | Player Set 5 | 257 | 0 | 139 km/h | | | Lv. 5 Curveball, Lv. 4 Screwball | w/RISP F, Poise F, Recovery C, Vs. Runner | | | | | | | | ||
Ouma Aasa  | SP/MR/CP | | | Player Set 4 | 483 | 12 | 155 km/h | | | Lv. 3 Hard Slider, Lv. 3 Hard Shuuto, Lv. 6 SP Forkball 8 | Poise A, Bullet, Recovery C, Carver, Ironball, Breaking Ball Pitcher, Pace | | | | | | | | Throwing C, Slugger, Rally, Victor | |
Yuka Yumeshiro  | SP/MR/CP | | | Player Set 5 | 356 | 2 | 110 km/h | | | Lv. 7 Screwball, Lv. 3 Changeup, Lv. 2 Slider | W/RISP B, Poise B, Recovery C, Cutter, Toolkit, Bluffer, Chill | | | | | | | | Charger, Aggressive Fielder | |
Eigou Yamino  | SP/MR/CP | | | Player Set 3 | 481 | 5 | 159 km/h | | | Lv. 4 SP Sinker 3, Lv. 4 Changeup, Lv. 3 Slider, Lv. 2 Slurve | Recovery C, Trusty, Choker, Unlucky, Breaking Ball Pitcher | | | | | | | | Slugger, Pull Hit, High Hit, Menace, Slugger, Aggressive Hitter | |
Ryuga Doe  | SP/MR/CP | | | Player Set 4 | 559 | 10 | 151 km/h | | | Lv. 3 Shuuto, Lv. 3 Knuckleball, Lv. 7 Cutter | Poise B, Heater B, Recovery C, Ironball, Trusty, Chill | | | | | | | | Clutch B, Clinical, Slugger, Sprayer, Low Hit | |
Kaoru Zento  | SP/MR/CP | | | Player Set 5 | 279 | 1 | 151 km/h | | | Lv. 4 Changeup, Lv. 1 Hard Slider, Lv. 1 Hard Shuuto | Vs. LHB F, Heater B, Hot Head, Power Pitcher | | | | | | | | Stealing B, Trucker, Aggressive Stealer, Aggressive Runner | |
Alex  | SP/MR/CP | | | Player Set 1 | 385 | 2 | 148 km/h | | | Lv. 3 Hard Slider, Lv. 5 Splitter | Cutter | | | | | | | | Slugger | |
Futoshi Marumochi  | SP/MR/CP | | | Player Set 2 | 217 | 0 | 151 km/h | | | Lv. 1 Curveball, Lv. 3 Changeup | W/RISP F, Vs. LHB F, Recovery G, Battler | | | | | | | | ||
Shingeki Kai  | SP/MR/CP/C/1B/2B/3B/SS/OF | | | Player Set 5 | 408 | 0 | 143 km/h | | | Lv. 4 Forkball, Lv. 2 Cutter | Chill | | | | | | | | Setter | |
Masuto Kaji  | SP/MR/CP | | | Player Set 4 | 443 | 4 | 151 km/h | | | Lv. 3 Slider, Lv. 3 Forkball, Lv. 3 Shuuto | W/RISP A, Poise A, Recovery C, Lucky | | | | | | | | Throwing C | |
Octavia  | SP/MR/CP | | | Player Set 1 | 414 | 4 | 143 km/h | | | Lv. 1 Hard Slider, Lv. 1 Slurve, Lv. 1 Sinker, Lv. 1 Shuuto, Lv. 4 SP Forkball 9 | Recovery C, Cutter, Trusty, Lucky, Tyrant | | | | | | | | Throwing C, Clinical, Push Hit | |
Natsuki Tamane  | SP/MR/CP | | | Player Set 1 | 313 | 1 | 147 km/h | | | Lv. 4 Shuuto, Lv. 3 Curveball | W/RISP C, Poise C, Heater C, Battler, Timer, Hot Head, Moody | | | | | | | | ||
Takuma Shinogi  | SP/MR/CP | | | Player Set 3 | 451 | 7 | 151 km/h | | | Lv. 5 SP Shuuto 4, Lv. 3 Screwball, Lv. 3 Splitter | W/RISP C, Vs. LHB B, Poise E, Heater C, Cutter, Ironball, Insider | | | | | | | | Buzzkill | |
Roseo Verrese  | SP/MR/CP/OF | | | Player Set 1 | 477 | 2 | 155 km/h | | | 2SFB, Lv. 2 Knuckle Curve, Lv. 3 Splitter | W/RISP C, Vs. LHB G, Poise F, Grit C, Heater C, Recovery C, Guts, Chill, Right Side Pitching | | | | | | | | Clutch C, Vs. LHB G, Grit C, Throwing E, Recovery C, Victor, Rally | |
Horusrun  | SP/MR/CP | | | Player Set 1 | 398 | 6 | 150 km/h | | | Eephus, Lv. 3 Cutter, Lv. 4 SP Sinker 4 | W/RISP B, Poise B, Heater B, Ironball, Tyrant, Chill, Star | | | | | | | | ||
Touma Kamase  | SP/MR/CP | | | Player Set 1 | 234 | 0 | 144 km/h | | | Lv. 3 Slider, Lv. 3 Forkball | Poise A, Heater E, Downplay, Choker, Unlucky | | | | | | | | Clutch F, Blunder, Grounder | |
Momiji Arima  | SP/MR/CP | | | Player Set 1 | 382 | 2 | 135 km/h | | | Lv. 3 Circle Change, Lv. 5 Palmball, Lv. 6 Slow Curve | Grit B, Crossfire, Toolkit, Airball | | | | | | | | Throwing E | |
Takafumi Tezuka  | SP/MR/CP | | | Player Set 1 | 324 | 1 | 139 km/h | | | Lv. 4 Slider, Lv. 5 Curveball | Agile B, Cutter, Timer | | | | | | | | ||
Akamitsu Akutsu  | SP/MR/CP | | | Player Set 1 | 179 | 0 | 139 km/h | | | Lv. 4 Forkball | Poise B, Recovery C, Low Ball, Breaking Ball P | | | | | | | | Runner B | |
Yakumo Hokuto (V2)  | SP/MR/CP | | | Player Set 4 | 455 | 8 | 151 km/h | | | 2-Seam Fastball, Lv. 6 Forkball, Lv. 6 Cutter | Heater B, Recovery C, Pace | | | | | | | | Throwing C | |
Yasushi Abata (Older)  | SP/MR/CP | | | Player Set 2 | 316 | 2 | 145 km/h | | | Lv. 2 Shuuto, Lv. 5 SP Forkball 1 | Recovery C, Breaking Ball Pitcher | | | | | | | | ||
Kazuhito Fukami  | SP/MR/CP | | | Player Set 3 | 311 | 3 | 146 km/h | | | Lv. 4 Hard Shuuto, Lv. 2 Curveball | Resolve, Grit F, Recovery C, Cutter, Ironball, Tyrant, Insider | | | | | | | | Throwing C | |
Anne Aznable (Japanese League) | SP/MR/CP | | | Player Set 1 | 295 | 1 | 143 km/h | | | Lv. 2 Slider, Lv. 1 Shuuto, Lv. 3 Curveball, Lv. 3 Forkball | W/RISP B, Agile B, Recovery C, Reflexes, Gripper | | | | | | | | ||
Tomoe Tsukami  | SP/MR/CP | | | Player Set 1 | 321 | 1 | 138 km/h | | | 2SFB, Lv. 3 Slider, Lv. 3 Forkball, Lv. 1 Circle Change | Heater B, Agile B, Recovery C, Reflexes, Toolkit, Timer, Pace | | | | | | | | Clutch B, Recovery C, Clinical, Sprayer | |
Yuuto Morumoto  | MR/CP/OF | | | Player Set 4 | 289 | 0 | 141 km/h | | | Lv. 4 Cutter, Lv. 2 Splitter, Lv. 2 Hard Shuuto | Poise A, Grit A, Heater B, Agile B | | | | | | | | Runner A | |
Alan Raven  | SP/MR/CP/OF | | | Player Set 5 | 576 | 12 | 161 km/h | | | SP Fastball 11, Lv. 5 Power Curve, Lv. 3 Forkball, Lv. 3 Screwball | W/RISP B, Poise B, Heater A, Agile F, Recovery C, Charm, Dr. K, Battler, Vs. Slugger, Downplay, Star, Power Pitcher | | | | | | | | Clutch B, Stealing E, Runner F, Pull Hit, Rally, Morale, Easy Out, Grounder | |
Reibu 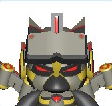 | SP/MR/CP | | | Player Set 3 | 496 | 6 | 155 km/h | | | Lv. 4 SP Slider 3, Lv. 4 Shuuto, Lv. 2 Power Curve, Lv. 2 Sinker | Recovery F, Engineer, Cutter, Toolkit, Breaking Ball Pitcher | | | | | | | | Throwing B, Recovery F, Surgical, Good Eye | |
Mitsuyo Suiko  | SP/MR/CP | | | Player Set 4 | 277 | 0 | 148 km/h | | | Lv. 3 Hard Slider, Lv. 2 Changeup, Lv. 2 Screwball | Recovery C, Bluffer | | | | | | | | Clutch B, Slugger, Slugger | |
Takeshi Isamura  | SP/MR/CP | | | Player Set 3 | 390 | 3 | 147 km/h | | | Lv. 4 Forkball, Lv. 2 Curveball, Lv. 2 Sinker | Poise B, Tyrant, Low Ball, Chill, Pace | | | | | | | | ||
Zenzai  | SP/MR/CP | | | Player Set 1 | 341 | 2 | 142 km/h | | | Lv. 3 Sinker, Lv. 3 Vertical Slider, Lv. 4 SP Curveball 1 | Agile B, Recovery C, Toolkit, Airball, Breaking Ball P | | | | | | | | Stealing B, Runner B, Recovery C, Push Hit, Bunt, Squibber | |
Red 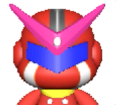 | SP/MR/CP | | | Player Set 4 | 455 | 5 | 155 km/h | | | Lv. 2 Slider, Lv. 2 Forkball, Lv. 2 Shuuto | W/RISP A, Heater A, Recovery C, Ironball, Star | | | | | | | | Clinical, Slugger, Slugger | |
Aira Kikudo  | SP/MR/CP | | | Player Set 4 | 233 | 0 | 142 km/h | | | Lv. 2 Cutter, Lv. 2 Slurve, Lv. 5 Splitter | Recovery C, Gyroball, Momentum, Battler | | | | | | | | Hot Bat, Clutch | |
YakyuMask (Susumu Ikari)  | SP/MR/CP/C | | | Player Set 5 | 743 | 9 | 155 km/h | | | Lv. 6 Slider, Lv. 4 Forkball, Lv. 4 Sinker | W/RISP B, Recovery C, Handler, Meatball | | | | | | | | Catcher B, Clinical, Slugger, Rally | |
Julius Tenoro  | SP/MR/CP/1B/3B | | | Player Set 2 | 368 | 0 | 138 km/h | | | Lv. 2 Splitter, Lv. 2 Changeup | Low Ball, Toolkit, Star, Pace | | | | | | | | Clutch B, Throwing B, Blunder | |
Cocoro Hibikino  | SP/MR/CP/SS | | | Player Set 1 | 301 | 0 | 137 km/h | | | Lv. 2 CB, Lv. 4 SP Forkball 10, Lv. 2 Forkball | Poise A, Recovery G, Toolkit | | | | | | | | Throwing B, Rally, Morale, Slap Hitter, Patient Hitter | |
Shinichiro Hibino  | SP | | | Player Set 5 | 336 | 2 | 145 km/h | | | Lv. 4 Slider, Lv. 4 Forkball | Insider, Clincher | | | | | | | | ||
Senga Katori  | SP/MR/CP/1B | | | Player Set 4 | 293 | 0 | 140 km/h | | | Lv. 3 Slider, Lv. 4 Curveball | Vs. LHB C, Recovery C, Engineer, Lucky, Power Pitcher | | | | | | | | ||
Bannou Kujo  | SP/MR/CP | | | Player Set 4 | 420 | 1 | 152 km/h | | | Lv. 4 Screwball | Poise F, Dynamo | | | | | | | | Throwing C, Bunt | |
Takai Biishiki  | SP/MR/OF | | | Player Set 5 | 450 | 3 | 141 km/h | | | Lv. 4 SP Curveball 2, Lv. 3 Sinker, Lv. 2 Slider, Lv. 2 Palmball | Heater E, Agile B, Recovery C, Gripper, Toolkit, Clincher, Star, Breaking Ball Pitcher | | | | | | | | Survivor, Clutch | |
Minoru Tsuchinaka  | SP/MR/CP | | | Player Set 5 | 318 | 3 | 135 km/h | | | Lv. 5 SP Forkball 5, Lv. 3 Changeup, Lv. 3 Curveball | Poise E, Grit C, Agile B, Recovery C, Carver, Pickoff, Reflexes, Guts, Hot Head, Moody, Breaking Ball Pitcher, Pace | | | | | | | | Throwing C, Rally, Blunder, Patient Hitter, Selfless | |
Daisuke Bonda  | SP/MR/CP | | | Player Set 2 | 265 | 0 | 142 km/h | | | Lv. 2 Slider, Lv. 2 Forkball, Lv. 2 Hard Sinker | Recovery C, Trusty | | | | | | | | Clutch B, Squibber | |
Fukiko Shirase  | SP/MR/CP | | | Player Set 5 | 293 | 0 | 130 km/h | | | Eephus, Lv. 2 Palmball, Lv. 2 Sweeping Curve, Lv. 1 Circle Change | Heater A, Trusty, Reflexes, Gripper, Toolkit, Pace | | | | | | | | Clutch B, Clutch, Good Eye, Slugger |
Catchers
Infielders
Outfielders
| || OF || || || Player Set 5 || || || || || || || || || || |-
